Sunday, December 22, 2013

Merry Christmas!


Please read this before you get all hyper-active on me about making a politically correct Christmas card. 

First, have you ever known me to be politically correct? Nope. Never have been, never plan to be. 

Next, have you ever known me to do anything in a timely manner? I'll take the fifth on that one.

I have a very sensible reason for putting "Happy Holidays" or "Season's Greetings" on my Christmas cards. I never know if I will get my cards done and in the mail in time for my friends and family to receive them by Christmas. This way I have my bases covered! 

Besides, why put all that effort into wishing your loved ones a single day of merriment, when you can send them wishes for a whole season of joy?!


Feel free to save my card and send it to your last-minute Christmas card email list. I added the glitter backgrounds because...well, because it's glitter! I couldn't decide which color I like best, so I just posted all three! Which one do you like best?


Have a Very Merry Christmas and a Safe and Happy New Year! 

See you next time!

Sunday, December 8, 2013

Evolution and a Linky Party

This morning I set out to decide what to do for the Christmas card exchange at "Stamp Club." *sigh* I really wanted to do something that looked like pergamano. If you don't know what that is, look it up. Go ahead. I'm not going anywhere....
Isn't that beautiful? A lot of the designs remind me of the dainty hankies ladies used to carry. My first attempt gave me this card. 


The tree is embossed on vellum, as are the diagonal lines behind it. Actually the first card was all white, but I decided to go with a little color. The card is Pool Party, the white is parchment cardstock, and the vellum is also cardstock.  
I just couldn't get that tree to suit my fancy, so I filed the pergamano idea away for another day, and went with a tree die cut from pearlized vellum. The shimmer doesn't show up in pictures at all for some reason.


I added the embossed Swiss dots behind the tree and moved the stripes to the frame. 
Then I remembered that it's time for the Heartwarming Vintage Linky Party. I just happen to have some adorable Christmas images that I purchased the other day, so...let's see if we can evolve some more!


This little angel is so sweet! It might sound intimidating if you haven't used digital images before, but it's really easy. Really. Just size, print, cut! Maybe I should do a post on the basics of using digi images sometime. Ok, put that on the list with pergamano. The hardest part of it is all the fussy cutting. Not my favorite thing to do. I put him on some really thin dimensional adhesives so he looks like he's stepping out of the oval. 
I liked him so much that I decided to try some cards that would work for any occasion.


These little girls were separated from their four friends. Yes, there are six little girls in cream colored coats, frilly little hats, and button-up boots. 


And this angel fit the horizontal layout perfectly. I used different embossing folders for the white frames on 
the little girls and this angel, but I kept the Swiss dots on the vellum behind them. I really don't think they need anything else at all! 

Sorry to skip out so fast, but it's late and I have to work the REAL job tomorrow! Click over to Heartwarming Vintage and check out the Linky Party. Have a great week!

Thanks for stopping by!

Sunday, December 1, 2013

Free December iWhatever Calendar and Desktop


I have had a serious case of calendar-maker's block! I just could not get this calendar to look like I wanted it to look. I think I erased everything and started over three times! It's still not what I was going for, but it's pretty enough to get us through the final month of the year, right? 

Here  is where to go if you need help loading this to your homescreen or lockscreen. And here is where to go if you want to learn how to make your own design. I have a plain December calendar for you if you need it....

 
And we can't forget the desktop version, which makes it much easier to see all the icons on your monitor....


I hope everyone had a wonderful Thanksgiving! I'll be back in a few days, hopefully with something to get us in the Christmas spirit!

Thanks for stopping by! 

Monday, November 25, 2013

Making a Messy Mistake Marvelous

I happened across two adorable die cut frames and decided that they needed to be chalkboards. I painted the frames, one pink and one blue, and lightly distressed them. 
Then I rolled black chalk paint on some foam board and adhered it to the back of the frames with Gorilla Glue.  I know, I know -- Gorilla Glue expands kind of like that spray foam insulation, right? I already knew that, so I only used a teeeeeeny tiiiiiiny skinny little line. *sigh*  Even a teeny tiny skinny little line expands. A LOT! So I wound up with a lumpy bumpy line of hard foamy-looking glue all along the inside of my frame.

What ever is a girl to do?! Get out the GLITTER! 


It was a good plan, but the glitter glue didn't dry evenly, so it just made a sparkly mess. I guess that's better, but still not acceptable.

Then I realized that the solution was my favorite "tool" in the world. Paper! I cut some scallop strips from glitter paper (Yes, I just happened to have the exact colors of glitter paper that I needed. You aren't surprised, are you?) and adhered them inside the frames. Voila! 


They turned out better than I expected because I messed up! How great is that?!

These are going to Ava Belle's, but hopefully not for long. I think they will find a good home real soon! 

What's your best save? Come on--everybody has one! Tell us about something that got messed up but you found a way to rescue. 
One of my favorite sayings is, "There are no mistakes in scrapbooking--only opportunities for embellishment." I like to apply that to as many aspects of life as possible!

Thanks for stopping by!

Friday, November 15, 2013

Welcome to the New and Improved Ava Belle's!


The flea market in downtown Aurora where Mom and I have a booth is moving        a-l-l      the       w-a-y    a-c-r-o-s-s      the      s-t-r-e-e-t!  Ok, actually it's across two streets and three doors down, but I like to play with words, so just go along with it, alright? 
It's been so much fun loading the new booth with tons of merchandise and making sure everything is arranged just right! This booth is smaller than the spot we had at the old building, but we managed to fit MORE stuff in it! 


We have lots of scrapbooking supplies,


several pretty lamps (including one made from an old hanging wire planter), 


a wall full of Christmas decorations (and then some!)


and lots of other pretties!


We even have stuff hanging overhead and on the backside of the hand-painted armoire (which is for sale) and our rescued display shelves!
We open to customers Monday. Peggy (Ava and Isabella's Gigi) has done an amazing job getting the building ready for us. Everything looks wonderful! If you're ever in Aurora Missouri stop by and leave us a message on that big chalkboard! 


Thursday, October 31, 2013

Free November Calendar and Desktop


It's November again! Time to pull up some Jane Austen on my Nook! I even have a fire where I can curl up and read now! And here is your November calendar for your iWhatever, complete with the Jane Austen font! I'm sure you all know the drill by now, but just in case, THIS tells you how to save the calendar to your lockscreen or homescreen, and THIS tells how you can make your own calendar. 


If you choose to make your own, feel free to use these days and dates.


And last, but not least, here is one for your desktop with open space all around the edges for all those unused icons floating around there!

Thanks for stopping by! See you next time!

Monday, October 28, 2013

New Wedding Invitations (and a Baby Shower)


I believe it's time to post a few new wedding invitations! 

Bailey and Aaron's wedding was in a very rustic chapel, overlooking Tablerock Lake. Her dress was lace and pearls in antique white. Everything had a very vintage feel, right down to the old "gangster car" parked outside. A sparkly doily on black silk paper fit right in! The RSVP postcard and a map with the couple's registry information slips into the pocket, right behind the wording.


The fans list the members of the wedding party and are one of my favorite wedding items I've ever made. They're just so pretty! We didn't want everything too matchy-matchy, so I printed on three or four different patterned papers and used three different colors of seam binding ribbon for the bows. Displayed in a pretty basket by the guest book, they were as pretty as any flower arrangement!


When Carissa asked me to make her invitations using camouflage and orange, I almost cried. I could not imagine how I could make it pretty. (You know how I feel about orange!) But the Realtree camo (Who knew there were different brands of camouflage?!) just looks like fall! The glittery orange tulle they planned to use for decorating added just enough color and sparkle. 


Chelsea decided to go away to get married, so she didn't use these, but she wanted something red and silver with a western feel. She would have needed her invitations very quickly, so I kept everything as simple as possible. I haven't mixed fonts or colors before, other than on Bailey's fans, but I really like that effect. 


Bowen's "Gigi" is an old friend of mine. In the past year her family has given her four grandchildren. F-O-U-R! I'm so jealous! Bowen's room is decorated with a vintage baseball theme, so of course his shower invitations needed to have that theme as well. I made these the same way I made Michael's graduation announcements. Everything was laid out on the computer then printed on heavy cardstock. 


Now for the really big news.... Most of this post was done on my iPad! I told you I'd figure it out. The only thing I had to use the computer for was to adjust the size of the pictures and the spacing of the text. The font is different, but I'll figure that out eventually. So now if I get in a pinch, I have a back-up plan! 

Thanks for stopping by! I'll see you in a few days when you come back for your November calendar and desktop!

Monday, October 14, 2013

Stitch Trickery

For the past several months I have participated in one, yes, ONE website's Linky Party each month. I skipped the party in September, but I'm back for October's. If the computer will ever finish scanning and updating! I'm typing this on my iPad, but to be totally honest, (my voice drops to a whisper) I don't know how to get the pictures from my iPad onto my blog! Please don't tell anyone. I'm waaaay to cool to be technologically inept. So I'll just keep typing and hope that all the updates finish before the party closes. 
And I'll add "Posting from my iPad" to my list of "Things I Need to Learn About Blogging."


The stitching around the edge of this card really sets if off, doesn't it? I learned this very simple trick about a year ago. You have to know how to adjust the tension on the bobbin thread in your sewing machine. My machine has a metal bobbin case that pulls out of the bottom part, under the needle. 


On one side of it is a tiny little screw with a very shallow slot for a tiny little screwdriver. So...you might want to get your reading glasses.

To put more tension on the thread, I would turn the screw to the right. (Righty-tighty) For less tension, I turn the screw to the left. (Lefty-loosey) To get my thread loose enough, I turned to the left until the screw was about to fall out, then just tightened it up enough to be sure that it would stay in place. 


This is the backside of my stitched card front. See how loose those stitches are? Bad for sewing clothing, good for a cute card!


The front just looks like any old machine stitching.


Grab the ends of the thread that came from the TOP of your machine and pull gently. As you pull the top thread tighter, it will pull the loose bottom thread up through the holes, creating those neat stretched out stitches. Be sure to tie off the ends of both the top and bottom threads.


Pretty cool, huh?! I used a button thread for the top of my machine. It's quite a bit thicker than the thread I normally use, so it shows up a little better. However, I could not make the button thread work in the bobbin. It made nice stitches, but I couldn't loosen the tension enough to get the effect I wanted.


I made this card with a digital image from The Crafty Secrets store. It came in their digital Halloween printables. (I think right now they are offering that as a free gift with a purchase!) I inked the edges, stamped the "Happy Halloween" (from SU! Hand-Penned Holidays), and adhered the almost-orange rectangle to a purple card. Then I printed the image I wanted to use, cut it with a circle Nestie, and cut the purple mat from the next bigger Nestie. 
Stack everything up, stick it all together, and there you go! An adorable little Halloween card! 


This card was made the same way, but instead of using a digital image, I stamped the image of the little girl on the pumpkin and added a little color with some colored pencils. She is in the SU! Greeting Card Kids.


Ok, I guess it's time to go check on the computer. Don't go anywhere--I'll be right back. Really! You won't even know that I'm gone!
Wow. It's STILL updating. Ugh. I am going to go get some sleep and when I wake up in the morning, hopefully it will be done and I can finish up!

**** 9 A.M. ****
The computer is still giving me fits! Ugh! Learning to post from my iPad just jumped to the top of my list of "Things I Need to Learn About Blogging!"

**** 10 A.M. ****
I finally gave up and found a way around the computer that just refused to cooperate! I didn't even throw it out in the yard. (Mostly because the tower is really heavy.) I do believe, however, that my cat learned a few new words!
I apologize if the pictures aren't quite as clear as usual, but at least they are here!
If you have a few minutes, hop over to the Heartwarming Vintage blog and see the rest of the Linky Partiers!

Thanks for stopping by! See you next time!


Sunday, September 29, 2013

Free October Calendar and Desktop

OCTOBER?!!! 
Yikes!


Yes, I know it's only the 29th of September, and I know that I am a procrastinator, but here is your October calendar for your iWhatever, complete with sort-of-Halloween-ish colors! 

I did some digi experimenting to get to this one. (See--I was playing--that's why it's ready early!) In the last few months I have accumulated a decent collection of old books, including dictionaries, bibles, hymnals, and other sheet music, and I wanted to include some pages in a calendar. So I took pictures of some of the pages, cropped them so nothing showed behind the paper, and saved them to my photo albums. Then when I went to Coolibah to make the calendar, I was able to pull up those pages just like any other picture. 
I also wanted to jump on the chalkboard bandwagon, so I used a black background and a font called Marcelle Script, which has a kind of chalky look to it.

When I finished the calendar I sent it to the desktop computer which has a much bigger screen. That was when I realized that the two papers at the top left truly belong there. One is the music for "As Time Goes By" and the other is a dictionary page with "four o'clock" as the first entry! 
Very appropriate for a calendar, don't you think? 

If you need help saving your calendar to your lockscreen or homescreen read this.

Here is the desktop version, with more open space for your desktop icons:


I know Halloween colors are traditionally black and orange, but I DON'T DO ORANGE! So this is as close as it's gonna get. I wore orange polyester from head to toe for five months and that was enough orange to last a lifetime. No, I wasn't in prison. I worked behind the bakery counter at Venture. The job was ok, but the uniform was...well...it obviously left me scarred. Luckily, I was able to transfer to cashier and wear normal clothes again after a few months! 

I guess that's it for now. Thanks for stopping by!
See you next time!

Sunday, September 15, 2013

New Supplies Challenge, Part 3


Way back in February I issued to myself a "New Supplies Challenge." (Part One and Part Two) It's been a while since I made anything from those new items, and to be perfectly honest, I have added to my stockpile supplies. Repeatedly. I know how shocked you must be, and I'm sure that I am the only one among us who has ever done anything like that. Mmm-hmmm....

Chalkboards are as trendy right now as chevrons. (I just don't get all the fuss about chevrons!) My chalkboard-ish stamp is from Stampin' Up! Chalk Talk. The phrase on the oval, "I'm so grateful there's you in the world," ties right in to the World Map background stamp and a Tim Holtz embossing folder called Airmail. My main goal tonight was to play with the new SU! Thinlits Label Card die. 

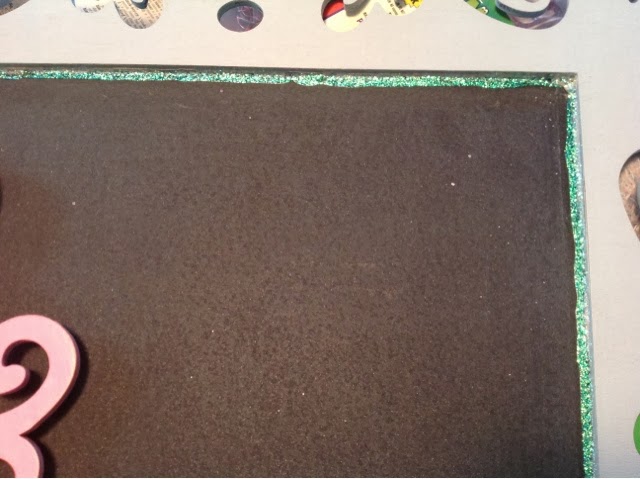
I started with kraft cardstock, a bit of natural parchment, a scrap of black cardstock, the stamps, embossing folder, dies, and ink. The picture shows white craft ink (to look like chalk on the black paper) and black ink, but I switched out the black for Crumb Cake, which is about the color of my kraft paper.   


 Let's begin now. Ooooh! In my head I sounded like the voice on the old 45's that came with Disney story books. You know the ones: "This is the story of Lady and the Tramp. You can read along with me in your book. You will know it is time to turn the page, when Tinkerbell rings her little bell. *brrrriiiing* Let's begin now...." Have I mentioned I'm sleep-deprived? That's when my nearly-ADD kicks into high gear.

So, the first thing I did was run a piece of 6x6 kraft paper (for the card base) and a piece of 6x6 parchment (for stamping and embossing) through the BigShot with the Label Card Thinlits die. It cuts part of the label shape from the center of the card and scores the fold lines. The fold lines do not go across the label, so do not fold the label. The left score line on the card base will be a mountain fold and the right score line will be a valley fold. When folded properly the card base will measure 4 1/4 x 5 1/2 inches.


Now for the parchment. Trim 1/8 inch off each side of the piece you will stamp and/or emboss. Next, cut along the score lines. You won't need the long strip from the middle or the two pieces of the label. The two pieces you have left are the perfect size to adhere to your card base. AFTER you play with them a little!


I embossed the smaller piece and stamped the larger piece...


then I used Crumb Cake to ink around the edges of both pieces with my fingertip, and slid my ink pad across the embossing to bring it out.


The label die is one of eight smaller dies included with the Label Card die set. I stamped the oval in white craft ink on black cardstock and ran it through the BigShot with the label die. I cut one more black label for inside the card. Then with a paper towel over my finger I smeared just a little white craft ink. (Craft ink is stickier and messier than dye ink.) Go easy on the ink--you can always add more. See how that makes it look chalkboard-ish?


Now it's time to put it all together! When it's laid out flat, you will see both pieces that you decorated and the back side of the label, which I left blank. When I give this to someone I will sign on the blank label with a white gel pen. I had mine all put together when I decided it needed something, so I had to use some Un-Du to remove both black labels. I tied a piece of red seam binding around the kraft paper label, then replaced the black pieces on top of the ribbon so only the bow shows.


If I wanted to add another sentiment I could run it along the strip in the center or, since I used such a light ink for the background stamp, I could stamp on top of it in black.
Here is another look at the front of the finished card....


There you go! It seems like a lot of work, but it's really not. I just wanted my directions to be very clear, since it's a new die that few people are familiar with. 

So, let's see.... 
one new embossing folder (Airmail)
one new background stamp (World Map)
one new stamp set (Chalk Talk)
one new die ( Label Card)
Cool! I used four things from my New Supplies stash! I hope I've inspired you to use some of your stash! Please let me know if I did. I'd love to hear from you!

Thanks for stopping by! See you next time!

Sunday, September 1, 2013

Free September Calendar and Desktop

*Edited Sunday September 8th*

I spent a week with the calendar and I'm just not happy with it. So I went back to Coolibah and switched out the background paper. Two taps on the screen and that's it! This one feels much better.

Ok. Now I'm going out to relax at the pool for a bit, then try to come up with something new. Hope to be back this evening!


*The Original Post--Sunday September 1*


Another month gone! We've had hardly any summer at all, now it's time for fall! Sorry I haven't been around much this month. I'm sure you have managed to keep yourself busy without me! heehee!

You know the drill. If you are new to my posts and don't know the drill, WELCOME! You can learn the drill if you follow this link for instructions to load this pretty calendar to the lockscreen of your phone or iWhatever. Or if you would like to make your own calendar, go to this page to learn how to do just that using Coolibah (my favorite iPad app!) 

Here is a desktop version for your laptop or home computer. It doesn't have as much going on so it's easier to see your icons. 


And, last but not least, here is the days and dates part of September, to use if you want to make your own.


That's all I've got for now, but I'll try to get back later in the week or at least next weekend. Until then....
Thanks for stopping by! See you next time!