Sunday, June 30, 2013

Free July Desktop and Calendar

It's JULY! And the weather makes it feel like MAY! It's twelve o'clock noon on the last day of June and the temperature at my house is SEVENTY-THREE DEGREES! Not good for this cold-natured girl who dreams of living in Hawaii someday. I'll most likely have to make due with the desert southwest, since real estate in Hawaii is a bit beyond our price range, but either way, I will be warm!

Here is your free July calendar to download to your iWhatever or other mobile device:


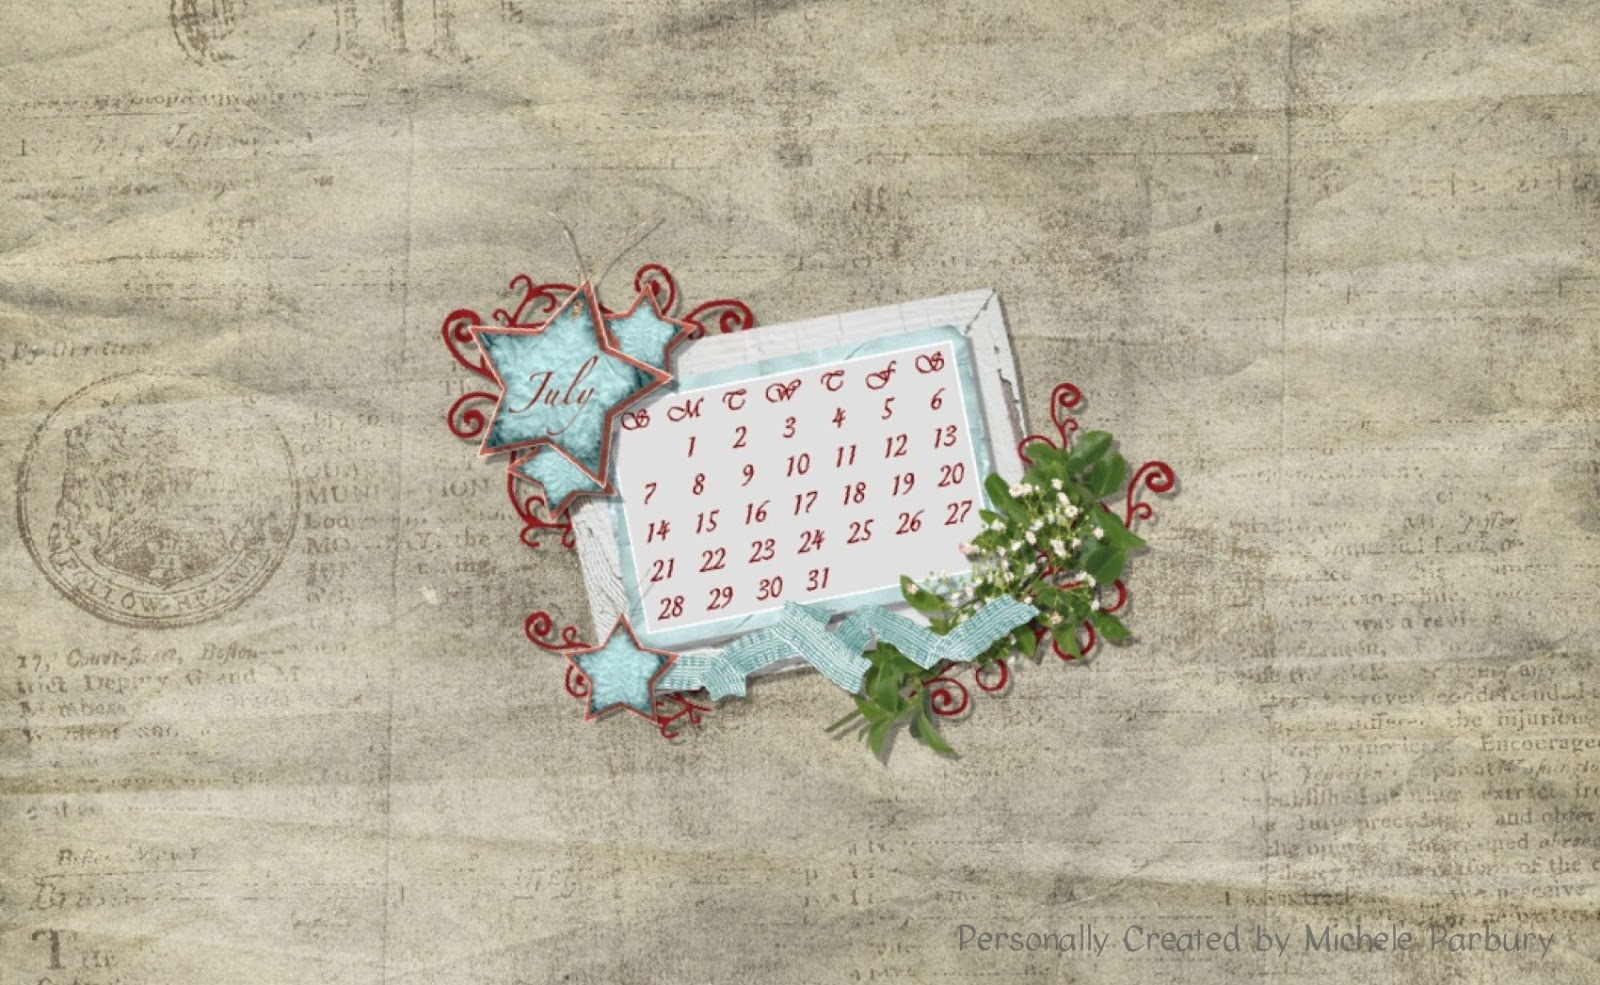
I thought for a moment that I had made another calendar with no sparkles, but I spy some peeking out from behind the greenery and frame on the right side. That is also the only pink, other than the shading on some of those little white flowers. Click here if you need help saving this calendar to your lockscreen or homescreen.

I made my calendar, as always, using Coolibah--still my favorite app! If you would like to make your own, follow this link to an earlier post that tells you how to do that. Feel free to use the days and dates part if you like:


And last, but not least, if you would like to have my calendar as your desktop background, here is one that has room around all the edges for your icons:


OK. I think you're good to go until August 1! You have no excuse for not knowing the date. ;)  
The next thing on my list is to go work on my lily pond (aka claw-foot tub that we buried in the flower bed). Hang on just a sec--I'll go get a picture....


It's a tad bit jungle-ish at the moment. But now I have  to go clean it up so I can show you an "after" picture next time!
I better go find a hoodie....

Thanks for stopping by! See you next time!

Monday, June 24, 2013

"Wedding March-ing"

Andy and I went to a lovely wedding Saturday evening. I NEVER used to cry or even get the least bit misty at weddings, but now that I'm seeing the "kids" that grew up with my boys going down the aisle, I can't keep the tears away! And I turn into a sniveling mess when one of them has a baby!
I got to know the bride, Becca, when she served as the drum major for our marching band. I'm sure for some of you that conjures images of a girl in a knee-length pleated skirt with a baton. Others might picture someone standing on a podium simply keeping time. But when you commit to being drum major for the Aurora Houn Dawg Marching Band (NOT the Aurora "Marching Houn Dawg" Band--take a moment to picture the difference) you take on a huge responsibility. We have a long-lived and very impressive reputation around the state, and the drum majors are the student leaders who help keep that reputation alive. They lead both on the field and off, setting a strong example for other band members with their work ethic and dedication. When the band takes the field, the drum majors do not simply keep time. They take charge and they conduct. These students know the music inside and out, forwards and backwards, and they almost always win the Best Drum Major awards at the competitions the band travels to each fall. Becca was very young when she stepped into the role--I think she was a freshman, possibly a sophomore--but "she wore the uniform," if you know what I mean. Having been unbearably shy until my senior year, I was impressed that an underclassman was able to carry herself with such confidence and poise.

Fast forward a few years and guess who Becca called about invitations when she started planning her wedding.... Yep, ME!

Becca wanted a casual country wedding using sunflowers and mason jars in some of the decorating, so I came up with this design for her invitations...


The card on the left is a thank you note. We decided to go with a monogram on half of the note cards and "Thank You" on the other half. That way, any left over cards can be used for any occasion. The card with the wording pulls out of the pocket and the RSVP and other information are tucked behind it.

We were able to work the mason jars into the Save the Date cards:


That is a piece of vellum that I ran through the printer then through the BigShot with a mason jar die. It really popped when I inked around the bottom and the shoulders of the jar. The "zinc" lid is a piece of silver metallic cardstock, also inked to bring out the lines, and that's a Top Note die behind the jar.

That's it for today! I have to get back to learning how to address envelopes using Excel. I don't enjoy using Excel or Word nearly as much as, say, Photoshop or Coolibah! 
Go figure!

Thanks for stopping by! See you next time!

Sunday, June 9, 2013

Easy Peasy Needle Case


How adorable is this little needle card?! My mom saw a picture of it through one of my links to the Heartwarming Vintage Blog and mentioned that she would like for me to print one for her, so...here you go, Mom!


This image is part of the Sewing Ephemera set offered by Crafty Secrets. You can find links to their online store at their blog. I won the whole sewing themed set in a giveaway! Sandy has lots of those! 
I printed two copies of the image on a sheet of 8.5 x 11 heavy white cardstock, then cut them out and scored the fold lines. When it's all closed up it's about 2.75 x 3.5 inches.


Can you see the tiny button in the middle of the bluebird's head on the bottom half? That's a brad that I put there to work as a closure. The little flap up at the top will slide under it. The legs of the brad show right now, but they're about to get covered up....


I cut a piece of kraft paper about 2.5 x 3.25 (just smaller than the folded card) and ran a line of adhesive along the bottom. It will hold the needles, so you only want one edge glued down.
(See--the legs of the brad are under the kraft paper.)


When it's all folded, the little button brad holds the flap very securely. You could also tie it closed with string or use a string and button/brad combination. It might even stay closed just by tucking the flap into the top, but I liked the little brad. :) 
Pretty easy, right?! I'm sure you know a seamstress, quilter, or cross-stitcher who would love to keep her needles in an adorable little case like this. If you're not crazy about the image on this one, you could make one out of any cardstock. But how could you not like this one?! If you print it the same dimensions I did it will be just the right size to hold a gift card to your needle crafter's favorite fabric/craft store! 
That's it for tonight! Now I'm headed over to put this up in the Heartwarming Vintage Linky Party. Have a great week!
Thanks for stopping by! See you next time!