Sunday, September 29, 2013

Free October Calendar and Desktop

OCTOBER?!!! 
Yikes!


Yes, I know it's only the 29th of September, and I know that I am a procrastinator, but here is your October calendar for your iWhatever, complete with sort-of-Halloween-ish colors! 

I did some digi experimenting to get to this one. (See--I was playing--that's why it's ready early!) In the last few months I have accumulated a decent collection of old books, including dictionaries, bibles, hymnals, and other sheet music, and I wanted to include some pages in a calendar. So I took pictures of some of the pages, cropped them so nothing showed behind the paper, and saved them to my photo albums. Then when I went to Coolibah to make the calendar, I was able to pull up those pages just like any other picture. 
I also wanted to jump on the chalkboard bandwagon, so I used a black background and a font called Marcelle Script, which has a kind of chalky look to it.

When I finished the calendar I sent it to the desktop computer which has a much bigger screen. That was when I realized that the two papers at the top left truly belong there. One is the music for "As Time Goes By" and the other is a dictionary page with "four o'clock" as the first entry! 
Very appropriate for a calendar, don't you think? 

If you need help saving your calendar to your lockscreen or homescreen read this.

Here is the desktop version, with more open space for your desktop icons:


I know Halloween colors are traditionally black and orange, but I DON'T DO ORANGE! So this is as close as it's gonna get. I wore orange polyester from head to toe for five months and that was enough orange to last a lifetime. No, I wasn't in prison. I worked behind the bakery counter at Venture. The job was ok, but the uniform was...well...it obviously left me scarred. Luckily, I was able to transfer to cashier and wear normal clothes again after a few months! 

I guess that's it for now. Thanks for stopping by!
See you next time!

Sunday, September 15, 2013

New Supplies Challenge, Part 3


Way back in February I issued to myself a "New Supplies Challenge." (Part One and Part Two) It's been a while since I made anything from those new items, and to be perfectly honest, I have added to my stockpile supplies. Repeatedly. I know how shocked you must be, and I'm sure that I am the only one among us who has ever done anything like that. Mmm-hmmm....

Chalkboards are as trendy right now as chevrons. (I just don't get all the fuss about chevrons!) My chalkboard-ish stamp is from Stampin' Up! Chalk Talk. The phrase on the oval, "I'm so grateful there's you in the world," ties right in to the World Map background stamp and a Tim Holtz embossing folder called Airmail. My main goal tonight was to play with the new SU! Thinlits Label Card die. 

I started with kraft cardstock, a bit of natural parchment, a scrap of black cardstock, the stamps, embossing folder, dies, and ink. The picture shows white craft ink (to look like chalk on the black paper) and black ink, but I switched out the black for Crumb Cake, which is about the color of my kraft paper.   


 Let's begin now. Ooooh! In my head I sounded like the voice on the old 45's that came with Disney story books. You know the ones: "This is the story of Lady and the Tramp. You can read along with me in your book. You will know it is time to turn the page, when Tinkerbell rings her little bell. *brrrriiiing* Let's begin now...." Have I mentioned I'm sleep-deprived? That's when my nearly-ADD kicks into high gear.

So, the first thing I did was run a piece of 6x6 kraft paper (for the card base) and a piece of 6x6 parchment (for stamping and embossing) through the BigShot with the Label Card Thinlits die. It cuts part of the label shape from the center of the card and scores the fold lines. The fold lines do not go across the label, so do not fold the label. The left score line on the card base will be a mountain fold and the right score line will be a valley fold. When folded properly the card base will measure 4 1/4 x 5 1/2 inches.


Now for the parchment. Trim 1/8 inch off each side of the piece you will stamp and/or emboss. Next, cut along the score lines. You won't need the long strip from the middle or the two pieces of the label. The two pieces you have left are the perfect size to adhere to your card base. AFTER you play with them a little!


I embossed the smaller piece and stamped the larger piece...


then I used Crumb Cake to ink around the edges of both pieces with my fingertip, and slid my ink pad across the embossing to bring it out.


The label die is one of eight smaller dies included with the Label Card die set. I stamped the oval in white craft ink on black cardstock and ran it through the BigShot with the label die. I cut one more black label for inside the card. Then with a paper towel over my finger I smeared just a little white craft ink. (Craft ink is stickier and messier than dye ink.) Go easy on the ink--you can always add more. See how that makes it look chalkboard-ish?


Now it's time to put it all together! When it's laid out flat, you will see both pieces that you decorated and the back side of the label, which I left blank. When I give this to someone I will sign on the blank label with a white gel pen. I had mine all put together when I decided it needed something, so I had to use some Un-Du to remove both black labels. I tied a piece of red seam binding around the kraft paper label, then replaced the black pieces on top of the ribbon so only the bow shows.


If I wanted to add another sentiment I could run it along the strip in the center or, since I used such a light ink for the background stamp, I could stamp on top of it in black.
Here is another look at the front of the finished card....


There you go! It seems like a lot of work, but it's really not. I just wanted my directions to be very clear, since it's a new die that few people are familiar with. 

So, let's see.... 
one new embossing folder (Airmail)
one new background stamp (World Map)
one new stamp set (Chalk Talk)
one new die ( Label Card)
Cool! I used four things from my New Supplies stash! I hope I've inspired you to use some of your stash! Please let me know if I did. I'd love to hear from you!

Thanks for stopping by! See you next time!

Sunday, September 1, 2013

Free September Calendar and Desktop

*Edited Sunday September 8th*

I spent a week with the calendar and I'm just not happy with it. So I went back to Coolibah and switched out the background paper. Two taps on the screen and that's it! This one feels much better.

Ok. Now I'm going out to relax at the pool for a bit, then try to come up with something new. Hope to be back this evening!


*The Original Post--Sunday September 1*


Another month gone! We've had hardly any summer at all, now it's time for fall! Sorry I haven't been around much this month. I'm sure you have managed to keep yourself busy without me! heehee!

You know the drill. If you are new to my posts and don't know the drill, WELCOME! You can learn the drill if you follow this link for instructions to load this pretty calendar to the lockscreen of your phone or iWhatever. Or if you would like to make your own calendar, go to this page to learn how to do just that using Coolibah (my favorite iPad app!) 

Here is a desktop version for your laptop or home computer. It doesn't have as much going on so it's easier to see your icons. 


And, last but not least, here is the days and dates part of September, to use if you want to make your own.


That's all I've got for now, but I'll try to get back later in the week or at least next weekend. Until then....
Thanks for stopping by! See you next time!

Sunday, August 11, 2013

A New Room From Old Stuff

We (and by "we" I mean My Darling Husband) recently decided that the seventeen year old vinyl flooring in the utility room had to be replaced. While I agreed that the floor was in terrible condition, I would have placed several projects ahead of that one. But being the dutiful wife that you know I am, I went along with Andy's plan.
In our week of vacation, we (and this time I mean Andy and I!) moved the washer, dryer, deep freeze and toilet to the front porch (ever so lovely), tore out the vinyl, its plywood backer, and the hundreds of staples holding it to the subfloor, removed all the baseboards, laid laminate that looks like barnwood, painted the walls and all the trim, attended a couple of family gatherings, and still managed to spend two days at the lake! I'd say we made that vacation count! We did have to break down and ask one of the boys to come help us move everything back. We were just too tired and sore and sunburned to move the deep freeze and washer without some help!
I'm sure you are on pins and needles, waiting to see how the room turned out, so...


I love it! The walls are a color called High Noon, but we paper crafters know it as Baja Breeze. I think all the colors look great with the new floor!
This is what I see from the kitchen door. The bathroom only got flooring and a fresh coat on the trim. I'm not quite ready to cover my landscape yet.


The dark red on the doors is leftover from the dining room. I thought about painting the doors white, but I've always loved Baja Breeze with just about any shade of red. I planned on painting the green frame under the folding table red also, but I think a little touch of green works.


We wanted to get a piece of barnwood to mount the mop & broom holder, but I remembered this old red shelf from when the boys were little. There's a scrap left that we will hang above the dog food with hooks for their leashes.


The "LAUNDRY" sign is a fold-up ironing board, and Andy built the barnwood cabinets years ago with wood from an old barn that used to be in our back yard. 

I can't stand plain old plastic light switch covers, so I came up with an easy fix for this room. Pretty paper and Mod Podge! I used a digital paper from Crafty Secrets. It's the quilt paper from their sewing papers.


 I came home from an auction recently with a huge box of onion skin paper that came with the awesome heavy-duty guillotine paper cutter I bought, so I printed the quilt pattern on a sheet of that. I learned that if you use a very thin paper, you definitely need to spread your decoupage medium on the back of the paper, not the switch plate. My first one came out wrinkled because I put the Mod Podge on the plate first. Spreading the Mod Podge on the paper lets the paper stretch before it goes on the plate. Otherwise, the paper wrinkles when it gets wet. That is probably Rule #1 of decoupage, but I've never had a problem with wrinkles before so I wasn't aware of it. Let the Mod Podge dry and add a protective coat on top, then when that dries use a craft knife to cut away the extra paper around the edges and from the holes for the switches and outlets. See...easy!


This pic shows the light switch and outlet covers in the bathroom. These images are called Flower Art Prints, also from Crafty Secrets.
It's time for the monthly Linky Party at the Heartwarming Vintage blog, where there are always lots of ideas using Crafty Secrets items. I'm heading over as soon as I sign off here to show off my switch plate covers!

Believe it or not, the only money we spent on this redo was for the flooring. Everything else was leftover from other projects or re-used! Please share your inexpensive makeover stories!

Thanks for stopping by! See you next time!


Sunday, August 4, 2013

August Desktop

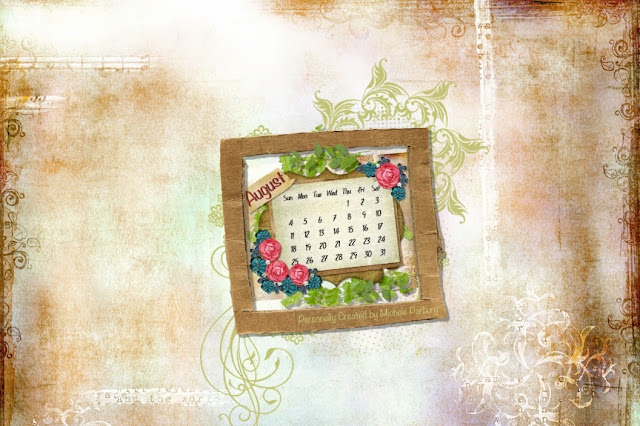
Here is the desktop version of the August calendar I promised you. Only four days late! 


I started altering the calendar a few months ago because our desktop computer has so many icons. Those icons are much easier to see and read when they are in the "quiet space" around the edges. 

To save this to your computer, right click on the photo. One of the choices that pops up will be "Save as desktop," or "Set as background," or something along those lines. That's it! Easy peasy, right?!

Thanks for stopping by (again!) See you next time!

Tuesday, July 30, 2013

Free August Calendar for Your iWhatever


August is a little confusing for me. While I love Love LOVE the hot dry weather that the month usually brings, I still get a little sad that the beginning of August also means the new school year is about to begin. And while I always loved school, I must have loved summer more. 

 My Aunt Leesa loved for everything around her to be bright and full of color, so this calendar was made with her in mind. We lost her last week, but I know she is watching all of us and chanting, "Na-na-na-na-na, I'm in Heaven!" How can we be sad when she puts it that way?! 

If you need help getting this to your iWhatever or phone, click here. Or if you would like to learn how to make your own calendar page using the Coolibah app, click here. You can use the days and dates I made or find another online.


I don't have the desktop background ready yet, but I'll be back to add it in a few days.

Thanks for stopping by! See you next time!

Wednesday, July 17, 2013

Are You Tired of My "Upcycling" Yet?


I really hate that term. "Upcycling." I guess maybe it sounds too much like upchucking. ewww. I think we should rejuvenate or maybe reincarnate. Ooh--I like that!

This is the story of how a sad and dated (and a little mildew-y) Home Interiors picture was reincarnated into a lovely jewelry display.

Better, huh?

Our story begins with a musty dusty old landscape that was acquired at auction. Sort of. (Long story for another day.) It also involves some chalk paint, fabric (leftovers from a trunk I "reincarnated"), and nine decorative pulls. These came from Hobby Lobby and were purchased at 50% off (of course!), averaging $1.50 each.


It's a very pretty picture, but there was some mildew on the mat and the shiny brass frame seemed to scream "1980's!" Don't get me wrong--I LOVED the 80's, but come on....


I took everything apart, discarded the mildewed picture, and set the glass aside. (I WILL come up with a use for it!) Hang on to the backer--we'll use it in just a second. In these Home Interiors pieces it is usually very sturdy. Kind of like a very thick chipboard that is screwed into the frame.

First I painted the frame with white chalk paint and brushed on just a bit of antiquing gel to bring out the design. Once the paint dried I put on a couple coats of wax and buffed it to a nice soft sheen.

I thought it would be easier to get everything lined up without the fabric in the way, so I placed several decorative drawer pulls on the backing and marked their positions. (Make sure you put the top at the top and the bottom at the bottom, or you might not be able to use the hanger.) Then I used my Crop-a-dile to punch holes for the pulls to go through.

I used spray adhesive to hold the fabric in place on this one, but I have since made more and used regular old glue. I like using the spray better, but the liquid worked just as well as long as it was spread thin.

I trimmed away the excess fabric, right up to the edge of the backer board, and punched the holes again, this time going through just the fabric.

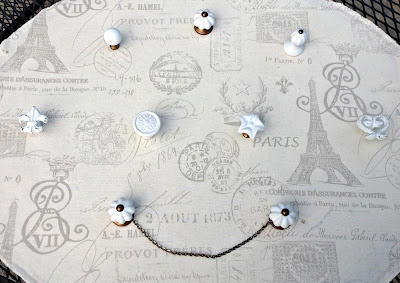
 Then it was time to add the pulls! Between two of the knobs I attached a short piece of chain for hanging earrings. The picture above^ shows the front,


and this picture shows the back. A pair of bolt cutters would probably work very nicely on these bolts that need to be cut, but, alas, there are no bolt cutters to be found in my home or garage. So I used the Dremel instead. It's a small electric rotary tool. You know, ladies--like the one your manicurist uses on your acrylic nails! There is a flat round blade that works like a tiny little circular saw and cuts those babies right off. But be warned--there are a lot of sparks involved! 

All that was left was to re-attach the backer to the newly painted frame, and hang it on the wall!


I just love it! It sold so fast at AvaBelle's that Mom and I each made another, so now we have two in our booth! Stop in and check them out sometime if you're in the neighborhood!

Thanks for stopping by! See you next time!