Showing posts with label home decor. Show all posts

Friday, July 25, 2014

Stand-Up Mini Album


Ok. I said I'd be back with a project, didn't I? It took longer than I expected to get fully inspired, but this is a sneak peek at the finished album. It's 5x7, so it will fit in an envelope for mailing (with a couple extra stamps. Mine turned out quite thick.) If you want to see the whole thing, you'll just have to stick around and read the rest of my post. ;)

I started with a plan and even took a picture of my supplies to share with you here. Then I shifted gears just a bit, so instead of the pic, I'll just give you the list of what I actually used:
  • Two sheets 12x12 heavy pink cardstock for the body of the album
  • Three sheets 12x12 heavy white cardstock for the frames
  • Glitter cardstock (a girl has to have her glitter, right?)
  • Punches for embellishments--I used flowers, a flourish, and a paisley
  • Ribbon and jewels or brads
  • An assortment of dies for cutting frames--I started with circles and squares but decided rectangles and ovals were a better fit. 
From one piece of pink I cut a 7x10 strip and scored it down the middle, so I basically had a 5x7 card. From the other piece of pink I cut a 7x12 strip and scored it at 5 inches and 10 inches, so I had a 5x7 card with a little 2 inch flap. That flap will connect the two pieces later. 


But first....
I folded both pieces and ran them through the Cuttlebug in a paisley pattern embossing folder. I used paper with a white core, so I sanded the embossing a little to make it pop. 


Next I adhered the two pieces together using that two inch flap, so I had a four page accordion album. 
Don't worry about the flap--we will cover it up later. 


Now for the frames. Using a variety of rectangular and oval Nesties, I cut frames for each of the four inside pages and the cover, as well as a solid piece of white (not in the picture) to serve as the back of each frame. I used a Dotted Swiss embossing folder on one of the two matching frames and the thinner oval, and I layered the two ovals together to make one frame. 


I adhered a strip of ribbon across the front--long enough to wrap around and tie a pretty bow. Then I placed all the frames. 


Remember that extra two inch flap on the back? I cut two 5x7 pieces from my strips of leftover cs and
adhered them to the back. Then I added a piece of lined paper, die cut to match the frames, for journaling. 


Now for the embellishments! I cut a 'J' for the front because this is going to a new baby whose name starts with 'J.' Then I punched several flowers, flourishes, and paisleys from the glitter paper and some of the scrap pieces of white. I scattered those among the frames, and this is what I ended up with:


I know it's basically just an accordion album, but with the extra layer on the back, it's stable enough to stand up and use as a table top frame. Now I think I'll try one in landscape orientation. Hmmmmm....


    No, I didn't make a horizontal version already. I was so focused on making this stand up that I didn't even consider hanging it on the wall! How cute is that?!

Ok. That's it for now. Time for me to go work outside. 
Thanks for stopping by! See you in a few days with the August calendar!


Monday, November 25, 2013

Making a Messy Mistake Marvelous

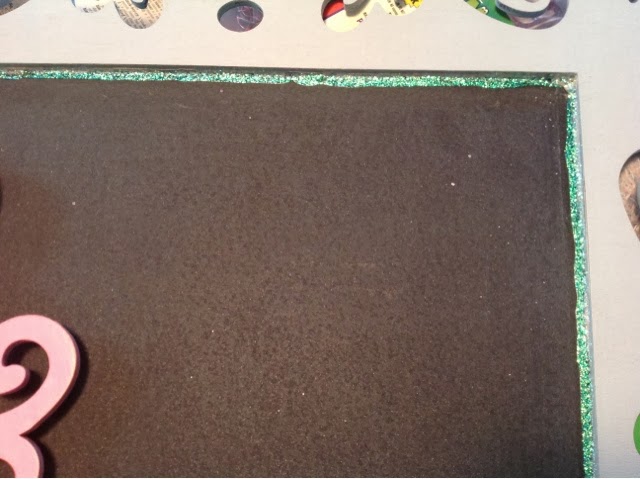
I happened across two adorable die cut frames and decided that they needed to be chalkboards. I painted the frames, one pink and one blue, and lightly distressed them. 
Then I rolled black chalk paint on some foam board and adhered it to the back of the frames with Gorilla Glue.  I know, I know -- Gorilla Glue expands kind of like that spray foam insulation, right? I already knew that, so I only used a teeeeeeny tiiiiiiny skinny little line. *sigh*  Even a teeny tiny skinny little line expands. A LOT! So I wound up with a lumpy bumpy line of hard foamy-looking glue all along the inside of my frame.

What ever is a girl to do?! Get out the GLITTER! 


It was a good plan, but the glitter glue didn't dry evenly, so it just made a sparkly mess. I guess that's better, but still not acceptable.

Then I realized that the solution was my favorite "tool" in the world. Paper! I cut some scallop strips from glitter paper (Yes, I just happened to have the exact colors of glitter paper that I needed. You aren't surprised, are you?) and adhered them inside the frames. Voila! 


They turned out better than I expected because I messed up! How great is that?!

These are going to Ava Belle's, but hopefully not for long. I think they will find a good home real soon! 

What's your best save? Come on--everybody has one! Tell us about something that got messed up but you found a way to rescue. 
One of my favorite sayings is, "There are no mistakes in scrapbooking--only opportunities for embellishment." I like to apply that to as many aspects of life as possible!

Thanks for stopping by!

Friday, November 15, 2013

Welcome to the New and Improved Ava Belle's!


The flea market in downtown Aurora where Mom and I have a booth is moving        a-l-l      the       w-a-y    a-c-r-o-s-s      the      s-t-r-e-e-t!  Ok, actually it's across two streets and three doors down, but I like to play with words, so just go along with it, alright? 
It's been so much fun loading the new booth with tons of merchandise and making sure everything is arranged just right! This booth is smaller than the spot we had at the old building, but we managed to fit MORE stuff in it! 


We have lots of scrapbooking supplies,


several pretty lamps (including one made from an old hanging wire planter), 


a wall full of Christmas decorations (and then some!)


and lots of other pretties!


We even have stuff hanging overhead and on the backside of the hand-painted armoire (which is for sale) and our rescued display shelves!
We open to customers Monday. Peggy (Ava and Isabella's Gigi) has done an amazing job getting the building ready for us. Everything looks wonderful! If you're ever in Aurora Missouri stop by and leave us a message on that big chalkboard! 


Sunday, August 11, 2013

A New Room From Old Stuff

We (and by "we" I mean My Darling Husband) recently decided that the seventeen year old vinyl flooring in the utility room had to be replaced. While I agreed that the floor was in terrible condition, I would have placed several projects ahead of that one. But being the dutiful wife that you know I am, I went along with Andy's plan.
In our week of vacation, we (and this time I mean Andy and I!) moved the washer, dryer, deep freeze and toilet to the front porch (ever so lovely), tore out the vinyl, its plywood backer, and the hundreds of staples holding it to the subfloor, removed all the baseboards, laid laminate that looks like barnwood, painted the walls and all the trim, attended a couple of family gatherings, and still managed to spend two days at the lake! I'd say we made that vacation count! We did have to break down and ask one of the boys to come help us move everything back. We were just too tired and sore and sunburned to move the deep freeze and washer without some help!
I'm sure you are on pins and needles, waiting to see how the room turned out, so...


I love it! The walls are a color called High Noon, but we paper crafters know it as Baja Breeze. I think all the colors look great with the new floor!
This is what I see from the kitchen door. The bathroom only got flooring and a fresh coat on the trim. I'm not quite ready to cover my landscape yet.


The dark red on the doors is leftover from the dining room. I thought about painting the doors white, but I've always loved Baja Breeze with just about any shade of red. I planned on painting the green frame under the folding table red also, but I think a little touch of green works.


We wanted to get a piece of barnwood to mount the mop & broom holder, but I remembered this old red shelf from when the boys were little. There's a scrap left that we will hang above the dog food with hooks for their leashes.


The "LAUNDRY" sign is a fold-up ironing board, and Andy built the barnwood cabinets years ago with wood from an old barn that used to be in our back yard. 

I can't stand plain old plastic light switch covers, so I came up with an easy fix for this room. Pretty paper and Mod Podge! I used a digital paper from Crafty Secrets. It's the quilt paper from their sewing papers.


 I came home from an auction recently with a huge box of onion skin paper that came with the awesome heavy-duty guillotine paper cutter I bought, so I printed the quilt pattern on a sheet of that. I learned that if you use a very thin paper, you definitely need to spread your decoupage medium on the back of the paper, not the switch plate. My first one came out wrinkled because I put the Mod Podge on the plate first. Spreading the Mod Podge on the paper lets the paper stretch before it goes on the plate. Otherwise, the paper wrinkles when it gets wet. That is probably Rule #1 of decoupage, but I've never had a problem with wrinkles before so I wasn't aware of it. Let the Mod Podge dry and add a protective coat on top, then when that dries use a craft knife to cut away the extra paper around the edges and from the holes for the switches and outlets. See...easy!


This pic shows the light switch and outlet covers in the bathroom. These images are called Flower Art Prints, also from Crafty Secrets.
It's time for the monthly Linky Party at the Heartwarming Vintage blog, where there are always lots of ideas using Crafty Secrets items. I'm heading over as soon as I sign off here to show off my switch plate covers!

Believe it or not, the only money we spent on this redo was for the flooring. Everything else was leftover from other projects or re-used! Please share your inexpensive makeover stories!

Thanks for stopping by! See you next time!


Wednesday, July 17, 2013

Are You Tired of My "Upcycling" Yet?


I really hate that term. "Upcycling." I guess maybe it sounds too much like upchucking. ewww. I think we should rejuvenate or maybe reincarnate. Ooh--I like that!

This is the story of how a sad and dated (and a little mildew-y) Home Interiors picture was reincarnated into a lovely jewelry display.

Better, huh?

Our story begins with a musty dusty old landscape that was acquired at auction. Sort of. (Long story for another day.) It also involves some chalk paint, fabric (leftovers from a trunk I "reincarnated"), and nine decorative pulls. These came from Hobby Lobby and were purchased at 50% off (of course!), averaging $1.50 each.


It's a very pretty picture, but there was some mildew on the mat and the shiny brass frame seemed to scream "1980's!" Don't get me wrong--I LOVED the 80's, but come on....


I took everything apart, discarded the mildewed picture, and set the glass aside. (I WILL come up with a use for it!) Hang on to the backer--we'll use it in just a second. In these Home Interiors pieces it is usually very sturdy. Kind of like a very thick chipboard that is screwed into the frame.

First I painted the frame with white chalk paint and brushed on just a bit of antiquing gel to bring out the design. Once the paint dried I put on a couple coats of wax and buffed it to a nice soft sheen.

I thought it would be easier to get everything lined up without the fabric in the way, so I placed several decorative drawer pulls on the backing and marked their positions. (Make sure you put the top at the top and the bottom at the bottom, or you might not be able to use the hanger.) Then I used my Crop-a-dile to punch holes for the pulls to go through.

I used spray adhesive to hold the fabric in place on this one, but I have since made more and used regular old glue. I like using the spray better, but the liquid worked just as well as long as it was spread thin.

I trimmed away the excess fabric, right up to the edge of the backer board, and punched the holes again, this time going through just the fabric.

 Then it was time to add the pulls! Between two of the knobs I attached a short piece of chain for hanging earrings. The picture above^ shows the front,


and this picture shows the back. A pair of bolt cutters would probably work very nicely on these bolts that need to be cut, but, alas, there are no bolt cutters to be found in my home or garage. So I used the Dremel instead. It's a small electric rotary tool. You know, ladies--like the one your manicurist uses on your acrylic nails! There is a flat round blade that works like a tiny little circular saw and cuts those babies right off. But be warned--there are a lot of sparks involved! 

All that was left was to re-attach the backer to the newly painted frame, and hang it on the wall!


I just love it! It sold so fast at AvaBelle's that Mom and I each made another, so now we have two in our booth! Stop in and check them out sometime if you're in the neighborhood!

Thanks for stopping by! See you next time!

Sunday, July 14, 2013

I Was Up-Cycling When Up-Cycling Wasn't Cool

At the end of the post for the July calendar, I added a photo of the small jungle garden in front of our house.


 When we bought our place almost 18 years ago (!) it had a huge sprawling evergreen and a very prickly holly bush under the front window. I despised that evergreen. My great aunt (the previous owner) used to pay me a penny for each bagworm I would pick off that thing. GAG! 

The evergreen became so overgrown that it had to be removed. Really--it would've caused structural problems. Honest. Once we pulled it out, roots and all, we were left with a rather large hole. Of course I couldn't stand to just fill it with dirt, so I found a claw foot tub (in the back yard) and an old oil can (also in the back yard. If you only knew!) and convinced Andy to dig out a little more so the tub would fit in the hole and we would have a wonderful little pond. 

The little garden has just kind of evolved since then. I have a lot of ajuga (I think that's how it's spelled) and vinca, some Japanese iris or flags, a painted fern, and some lily of the valley. Several years ago one of my aunts gave me some REAL water lilies. Native Missouri water lilies--not the wimpy kind you buy at Lowe's.  I tried several different water plants before Becky gave these to me, but nothing would carry over from year to year. These puppies are HARRR--DY!

When I finished posting the July calendar I went out to clean up a bit around the pond. The lily of the valley had really kicked in the last couple of years and kind of taken over the small space. I transplanted several clumps to a small hosta garden under a walnut tree in the back yard and took out what was left of a sad little azalea that just never took hold. I also had to work on (and by "work on" I really mean "beat on the porch floor repeatedly") the pump to get it to work again. Now all I need is a couple of bags of mulch to define the little path that goes behind the tub. 

 Doesn't it look better? It sounds great, too.


The front porch is just a few steps to the left, with a good old-fashioned porch rocker, some lush Boston ferns, a porch swing, and even some old motel chairs. I kind of like my place. Can you tell?
Where is your favorite place in your house? 

 Come back in a few days to check out another upcycling project. I'll show you how to turn an outdated frame into a shabby chic jewelry display.

Thanks for stopping by! See you next time!

Tuesday, April 16, 2013

Chalk Paint Paisleys (and a Chair!)


Good evening! Sometimes I come up with a quippy little title for a post and that makes me very proud. Other times I pretty much punt. ^ Oh, well. It covers all the important stuff!  :)

The home decorating and DIY blogs are full of posts about chalk paint, and you can't avoid all the chalk-paint-painted furniture ideas on Pinterest. (Not that you would want to!) Nevertheless, Yours Truly had never so much as dipped a brush into a reclaimed margarine tub of the stuff. Not being one to miss any opportunity to make a mess (just ask my mom or my husband), I felt compelled to give it a go. 

I understand that there are some lovely brands of chalk paint on the market. They come in a wide range of  colors and go on very smoothly. But I was planning to paint a chair that took a detour on its way to the burn pile, so I didn't want to pay the rather high price for one of those colors. I did a good bit of reading online and found several variations on basically the same three recipes. One uses Plaster of Paris (POP), another uses non-sanded grout, and the third uses calcium carbonate powder. I went with the POP because I'm cheap frugal. 

I've mentioned before that I'm not really one for recipes. But I thought it might be a good idea to use other peoples' experience to my advantage. I went with a three-to-one ratio of paint to POP, with enough water to dissolve the plaster powder. In a reclaimed margarine tub (You thought I was joking, didn't you?!) I mixed a little water into the POP. Once it was nice and smooth and about as thick as pancake batter, I added the paint. I used a flat white that I kind of splurged on. I was shocked at how little odor that paint had. 

I used a cheapy disposable brush and slapped on a couple coats of white, then added a few drops of acrylic to tint most of the paint that was left, saving just a little white for the stenciling. I wish I had taken pics, but it was just an experiment. I didn't expect to blog about it!

I painted the seat, the strip across the top, and the...uhh...flat piece in the middle of the back(?) with the blue. Honestly, I only left the legs and the spindles white because I wanted to get to the paisleys and it takes a long time to paint around all those spindles. Then I got to break out the stencil!

After all the paisleys were painted, I scuffed everything up a bit with sandpaper. I tried to keep it to the areas that would have worn over the years, like the tops of the stretcher where your feet rub, or where you'd grab the top to pull the chair away from the table.

Next I mixed a little stain with some good old fashioned furniture wax. I think I've had that can in my utility room cabinet for 15 years! I'm sure it was happy to be put to use. The stain was a very red shade, so the white paint looked very pink until I buffed it. I learned that if the wax sets up too thick (in this case, too pink!), you can rub in a little fresh wax and it softens so you can remove a little. Nifty!

Ok. You saw the seat up above. That pic is now the homescreen on my iPad. Here is the rest of the chair:


And another angle....


It will soon have a spot at our booth at Ava Belle's Flea Market in lovely downtown Aurora, Missouri. Hopefully someone will adopt it and give it a loving home. I see it in a nursery. 

Now that I'm on the chalk paint bandwagon, don't be surprised to see more painted furniture, and yes, most likely more paisleys!  ;)

Thanks for stopping by! See you next time!

Thursday, February 7, 2013

From Waterbed Drawer to Shabby Chic Shelf!


Time to "upcycle" again! This shelf/bulletin board used to be a drawer under a waterbed. Really! Isn't it adorable? I think this one is going to go live with a young lady I know, but there are five more drawers in my garage, lots of fabric in my scrap room, and still about 40 election signs waiting for their chance to live a purposeful life!

Let me show you what I did. Even if you don't have any old drawers lying around, or you don't have any interest in making a bulletin board shelf, maybe something I do will trigger a different idea for you. 

I started with the drawer, some acrylic paints, fabric, quilt batting, ribbon, some brads that very conveniently resemble upholstery tacks, the hot glue gun, and an election sign.

Maybe you remember what waterbed drawers look like. Pretty plain. Very 80's. I slopped on some nearly neon green acrylic paint, added a layer of crackle medium, and topped it off with a little white here, a little cream there, all kind of smooshed together. This is definitely NOT a project where neatness counts. 


The whole point of using something like a crackle medium is to make the piece look used and worn, and old paint doesn't crack evenly across the entire surface. Some areas will be smooth while some will have tiny checks and others will have huge cracks. So don't stress out trying to make it look "perfect!"
I sanded a little around the edges of the drawer where paint would naturally wear away then used some old acrylic antiquing gel that I watered down a bit and swiped across the surface just to bring out the cracks and bare wood a little more.

Now on to the inside....


I cut the sign just a bit smaller than the inside of the drawer and covered it with quilt batting, using hot glue to secure the edges.


Next, I wrapped the fabric over the batting, pulled it snug, and hot glued the edges. I divided the left and right sides into halves and the top and bottom into thirds to determine where to start and end the ribbon. 
The back of this will never show, so don't worry about mitering corners or making the edges even. You can even leave all the hot glue stringies all over the back!


These brads were all different colors when I started. I pushed them into a piece of foam and brushed on a coat of Vintage White acrylic paint. 


When that dried, I very lightly brushed the tops and edges with some shimmery pink puff paint. That's what I had on hand. I love to wear pink, but to be honest, with two boys, I've never had a lot of use for pink paint of any kind!


I pierced a hole through all the layers at each ribbon intersection and pushed the brads through. Then I squirted some hot glue on the back of the sign and pushed it down to the bottom of the drawer. With all the fabric and batting it was pretty snug. Now it's ready to load.


There you go! It can hang on the wall or sit just about anywhere. 
I can't wait to see my friend's reaction! Then I'll have to get busy and put together a few more to sell at the flea market!
So.... Did inspiration pay a visit? What did it say?
Thanks for stopping by! See you next time!

Sunday, December 9, 2012

The Grand Tour

Whew! After several weeks of moving and reorganizing, my new room is finally (insert loud screeching sound here)!

******************************************************************* 

One week later....

OK! Let's try this again! My new room is finally ready for me to use! WooHoo!
I thought it was ready about a week ago, but there was a glitch with the computer. We had to move the biggest piece in the room away from the wall so Andy could redo the wiring. Ugh! 
But now we're up and running and I'm ready to make something! I have several pictures to share, so here we go!


This is what you see when you step into my room. Do you Stampin' Up folks notice that color on the top of the walls looks a lot like Baja Breeze? The bottom of the walls was already black, and I just really didn't feel like painting that much, so the black stayed! The wall to the left faces north and has a window. The wall to the right faces east and lets in great light. The desk in the corner holds the computer, scanner, and printer. To the right of the sewing machine is a tall narrow chest of drawers that holds fabric. Several jars of buttons and sewing notions sit on top. The old library table in the center of the room makes a great work surface since we had a new piece of glass cut for it. The original piece of glass met an untimely demise when it found itself at the wrong end of a shotgun in Andy's childhood home. That's all I have to say about that. 
Moving on....


This little storage cart fits between the chest of drawers and the cabinet perfectly and can be rolled out of the way if I need to reach deep into the corner of the cabinet. Before the move I had border punches on a shallow wall shelf, but I added the top two boxes so now all my punches fit here. Each box has Sharpie drawings on the front to show what kinds of punches are inside. Nothing fancy or elaborate--just practical.


This cabinet is eight feet long, twenty-one inches deep, and thirty-six inches tall. It was headed for the trash when I found it at our old high school. It's had three different homes in the last five years. Do you know how difficult it is to move an eight foot long cabinet?! Of course this is the piece we had to move when the internet went out! It's staying put for a while. Andy raised it about 6 inches so my work surfaces would have different heights and maybe my neck and shoulders wouldn't get so stiff from always looking down at the same angle. Isn't he awesome?! Just wait--you still haven't seen the closet!


An old Coke crate is the perfect size to hold Starbucks bottles. I really need to clean out some of my embellishments. Am I ever going to use thirty spice bottles full of brads and eyelets?!


Inside the cabinet is still a little messy, but the top is ready and waiting! We've worked our way around to the door (on the far right of the photo ^), so we're almost done.


Here, behind the door, is my curtain rod full of ribbon. 
I bought cheap shower curtain rings, added badge clips, 
and clipped the ribbon on by color. I think that's the 
best cheap storage I've come up with so far. 
Here's a close-up:


The shelves to the right of the ribbon hold my stamps, 
and to the right of those shelves are some shallow 
shelves that hold ink pads, re-inkers, and embossing 
powders. The small table below is actually a sewing 
table. Andy added an outlet to this wall, so it's a good 
place for the heat gun.


To the right of the "stamping station" is the closet. When you open the doors, sometimes you can actually hear a choir of angels singing! lol


It's so well lit that in person, it looks like a store display! The switch is wired in like a refrigerator switch. The closet in our bedroom is wired that way, too, and we've always said that if we ever build again we will put those switches in all the closets. (I really think Andy just did that so that I will keep the closet picked up. If I let stuff pile up in the floor, I won't be able to close the doors and the lights would always be on! He knows me so well!)

Last stop on the tour, around the corner from the closet, is what I have dubbed the work table. Andy built this for me several years ago when I was crammed into a 30 by 40 inch alcove in the corner of our bedroom. There's a pull-out under the table top, mounted on drawer guides, kind of like a giant keyboard tray. I can have things laid out on the pull-out but still have room to work on top. Nifty, right?!


The shelves to the left hold envelopes, card samples, and lots of tools and dies. I plan to leave the BigShot out because I use it quite a bit. The Silhouette has a nice home there, too, with the computer just to the right of  the shelves that hold paint, glue, and brushes.

So there it is! Now maybe I can get back to making! I HAVE to get my Christmas cards started!
Thanks for stopping by! See you next time!