Thursday, March 8, 2012
Clear as Mud :)
Nothing new. Just an update. I went back to Tuesday's post to add some pics and try to clarify a little. I think it was easier to figure out than it was to explain! Hope that helps a little. I'll try to be back tomorrow, but it might be Saturday instead. See you then!
Tuesday, March 6, 2012
This is Why I Don't Bother Planning Posts Ahead of Time

They were in the middle of telling about a kit to make cards similar to this one, but with a heart instead of a circle. I'm sure there are tutorials out there, probably even on Splitcoast, that tell how to make a card like this, but I had a pretty good idea about how it could be done as soon as I saw it. It was easier than I thought it would be and you don't need a lot of supplies! Paper, stamps and ink, and some Nestabilities. I used the Lacey Circles and Standard Circles. Other shapes will work as long as they are symmetrical. Other brands will also work--you'll just have to adjust the "sandwich" for cutting.
Start with a 4.25 x 5.5 card base and a 4 x 5.25 mat. Line up the mat on the front of the card, stick it down with a tiny bit of adhesive (you're going to pull it off in just a minute), and mark the center of the mat from top to bottom.
Center the nestie on that mark.

Sandwich the card and mat between the B and C plates, placing the edge of one cutting plate along the center mark. You want to cover the right hand half of the circle (the half furthest from the fold) and run it through the machine. I like to use a little blue painters' tape with Nesties. They're so light and tend to shift easily, and that holds them in place without tearing the paper. Plus it's cheap!

Only the part with the plate on top will cut, so you only cut half a circle.
Now you'll want to run the mat through again by itself to cut the entire circle. If you do it this way, that first pass marks everything and makes it easier to line up. (Learned that one the hard way!)

Score the front of the card above and below the circle on the center line.

When you fold the front in half, the scallops will complete the circle.

Cut the mat in half from top to bottom and adhere the left half to what is now the front of the card.
Adhere the scallop circle to the base, lining up the scallops.
Adhere the scallop circle to the base, lining up the scallops.

Here is a different angle that shows the way the front is folded a little better. I used a stamp set from Crafty Secrets. They have the most beautiful vintage designs! The mat is a discontinued Stampin' Up! paper and the image is stamped on SU! Baja Breeze with Early Espresso ink. I liked this so much I had to make another!

I just love this little girl! She's also from Crafty Secrets. I wanted to put a banner with "Wishing You Bouquets of Joy" but it only fits inside.
See, it's not that hard, is it?! I don't know why the card on HSN grabbed my attention, but I'm glad it did. Now I want to use some different shapes. Wouldn't a square turned on end like a diamond look neat? I have a perfect Fleur de lis die for that!
Hmmm.... Gotta go!
Thanks for stopping by! See you Friday!
Friday, March 2, 2012
March Calendar
Happy March! I haven't exactly got the knack of planning my posts more than a day or two ahead yet, or I would have flipped my posts this week so you could start the month with a pretty new calendar. Hope you made it through the last day and a half without one! Here it is:

I made this calendar on my iPad using a free printable calendar I found online and Coolibah (my favorite app).Coolibah is amazing! You can see a few of my other Coolibah pages in one of my Facebook albums. Just click here. (This takes you to a login page then to my album.)
If you want to make a calendar of your own, I give directions in my post titled February Assignment. Or you can save this one to your computer, phone, or iPod to use as a wallpaper or home page. I like to save mine as the lock page on my iPad so it's there at the touch of a button. It even prints nicely. I printed a 4x6, a 5x7, and an 8x10 on photo paper and they all look great!
I only have one small favor to ask. When someone sees your phone and says, "Oh, my! What a lovely calendar," you have to tell them about your amazing friend, Michele, and her wonderfully entertaining blog!
Have a great day and thanks for stopping by! See you next week!
Tuesday, February 28, 2012
Good Enough for Marie Osmond!
 Hi again! Hope everyone is having a great day. I couldn't wait to show you these beautiful paper flowers and the card that I made with them yesterday morning. I get an email newsletter called "Weekly Inkling" from Splitcoast Stampers each Wednesday. In last week's issue there was a link to a tutorial by Judi M. (aka "Crafts") that explained how to make them. Of course I can't do anything exactly the way It's supposed to be done, so I went into my scraproom Sunday and changed it up a little.
I used a heavy pearlized cardstock and a Stampin Up! five petal flower punch to make the leaves. Just punch a flower and cut it into two pieces. Now you have two clusters of leaves, one with three leaves and one with two. I colored my leaves with Always Artichoke and Certainly Celery SU markers.
 Judi used a McGill punch that I don't have, so I made do with what I do have and used the little five petal flower punch from EK. I like the look of Judi's base petals better, but I am nothing if not frugal! The only real difference is the petals on the EK punch are more defined, so I just used one for the base, while Judi used three. I'm sure a small circle or scallop circle (1/2 inch or 5/8 inch) would work just as well. I was feeling rather lazy when I made the flowers (and my table is a HUGE mess), so instead of walking all the way over to my Cuttlebug (all four feet) and getting out my Nestie scallop ovals, I reached across my table for my 3 inch scallop oval punch. I punched just enough of one end of the oval to get six scallops and trimmed it down to a thin strip. I wanted cream colored roses, so I used a piece of pearlized cream stationery. It's about the same weight as a nice printer paper. (I tried cardstock first, but I couldn't get the petals to curl back very well.)
Now to put it all together! Judi used a mouse pad and an embossing tool to give a little bit of a curl to the base petals and the leaves. I don't have a mouse pad, but the arm of my sofa worked very nicely! If you don't have an embossing tool with a big tip, the clicker on an ink pen or the cap on a Sharpie will work the same way. Just lay the petals or leaves on the mousepad and rub around and around in small circles while pressing down. The harder you push down the more curl you get. I used hot glue to attach the base petal to the leaves. Then I wound the scallop strip around a skinny stick, hot glued it in the middle of the base, and curled the petals back.

This is what my table looked like (and pretty much still does!) when I finished playing Sunday. I made the little paper roses and experimented with another kind of flower that you'll see in another post.
Monday morning I came in to make a card for my friend Julie who celebrates her 16th birthday tomorrow. (Think about that one for a minute....) I had a really hard time coming up with a combination I liked. I'd pulled out several beautiful papers and dies to choose from, but it took forever to get it just right. Once I did, I mailed it to Julie and planned to make a copy of it for this post. When I came in here today I decided I should clean up a little. In the process I came across my last SU order. (See the bag in the lower left corner?)
 The Framelits Labels dies were still in the bag just begging to be broke in. The dies coordinate with the Apothecary Art set, which was also unused. The largest stamp in the set has a wreath of roses. Perfect! Just to stay with the "theme" I used a brand-new-never-even-unwrapped pad of Early Espresso.
I found a leafy green paper to use for the background, stamped the label on cream cardstock, and added "Happiest Birthday." I've had the trellis ribbon forever. I love it so much that I am very picky about where I use it, so if you get a card from me with trellis ribbon on it, you must be pretty special! I was happy with the first card, but I think I like this one even better. Sorry, Julie!

You can say it. Go ahead. I should have cleaned my table first. Yep. I should've. But don't for one second think that will reform me! I only cleaned until I got to the SU bag. The rest of the mess is still there!
Thanks for stopping by today--see you Friday! Happy birthday Julie!
Saturday, February 25, 2012
I Know I Said 'See you Friday,' But You'll Have to Talk to the Router
I know that everyone out there in www land was pacing the floor and wringing their hands in anxiety yesterday because I didn't post anything. Nothing to worry about, folks. I'm OK. Our internet router, however, apparently is not. I couldn't get online all day yesterday! *gasp* And I'm only on now because the stupid thing thinks I'm a guest. Ha! (Yes, I am sticking my tongue out at the router right now.)
I managed to keep myself busy all day even without being connected. Mom and I decided to take the leap (really it's more of a baby step) and open a booth in a flea market.
There's an old building here in Aurora that was built as a hotel in the town's early days. It sits directly across the street from the old bank building, and was originally The Bank Hotel. The building now houses Uncle Doc's Flea Market.
Mom and I spent a few hours yesterday arranging some things on the shelves we are renting until Doc has a booth available. Here's how it turned out:

I managed to keep myself busy all day even without being connected. Mom and I decided to take the leap (really it's more of a baby step) and open a booth in a flea market.
There's an old building here in Aurora that was built as a hotel in the town's early days. It sits directly across the street from the old bank building, and was originally The Bank Hotel. The building now houses Uncle Doc's Flea Market.
 |
| This is what Uncle Doc's looked like in the...30's? 40's? |
 |
We still have more stuff to put out, but for the time being this will work. Mom had mostly glasswares and I had mostly scrapbooking supplies. Go figure. I admit it--I'm a tool junkie. I always want to try the newest, coolest tools. But there's not a scrapbook store around here that carries a lot of tools. OK, there's not a scrapbook store around here at all. We have Michael's & Hobby Lobby in Springfield (30 miles away), and there is one store that is just scrapbooking stuff, but they are pretty limited to paper & embellishments. I don't want to use embellishments someone else designed. I want to make MY OWN. (Kind of like the whole Mexico book thing....) Does that make me a control freak? Anyway, I buy tools and do just that! Now when I get bored with a tool, I can move it to Doc's and someone else can enjoy it. (I feel like singing the song from Rudolph -- "We're on the Island of Misfit Toys....") Plus whatever I make from selling my unused stuff will buy more new toys! WooHoo! I mean tools. Yeah, tools.)
I even managed to squeeze some self promotion onto the shelves. I made a flyer with my business card at the top and pics of some of the wedding announcements I've made. I included the blog address at the bottom.

I've decided that it's time to actively recruit blog followers, so I added the address to the back of my business cards, too. I promised Mom earlier today that one of my upcoming posts will be a step-by-step tutorial on how to become a follower. I know there are millions of you out there who have tried and haven't been able to figure it out, so I'll solve your problem and mine! As soon as I figure it out myself!
Thanks for stopping by! I hope to see you Tuesday--if the router is feeling cooperative. :)
Tuesday, February 21, 2012
Lessons Learned
So.... I completed all of my experimentation with my supplies I showed you the other day. And I really like how my project turned out. BUT I learned a few things. I would be happy to share them with you so you can learn from my experience.
1. Dry corn husks will absorb color better if you soak them in water first. (You never know when that one might come in handy!)
2. All those tiny little fibers that come off a piece of burlap are a real bear to get out of sweat pants.
3. Dry mimosa seed pods do not bend. No way, no how.
4. Mod Podge is awesome, but sometimes you just have to plug in the old hot glue gun.
5. When you're on vacation in the tropics and you see a really cool book made with all kinds of interesting fibers and plant parts, BUY IT! It's well worth the ten or twelve bucks to get that look!
That being said, here are the highlights of what I did:

I soaked the dry corn husks ("upcycled" from the tamales I had for lunch!) in a jar of water until they were soft, then patted them dry. Then I poured a little of my homemade walnut ink in a saucer and soaked the husks in that for a few minutes. (see Lesson #1) When I was tired of waiting I moved the husks to dry on some paper towels. Be careful where you put them--that walnut ink stains!

While those were drying I crumpled up the tissue paper and used the Stampin Up! Always Artichoke to ink it all over. I wanted the look of leaves and the green paper was too bright. I also inked some tan tissue paper, so I came out with two different shades of green that would pass for the colors of tropical leaves.

I spread Mod Podge on a narrow strip of chipboard (2 1/2 x 8 3/4 inches) and laid out pieces of embroidery floss in kind of a fan pattern to resemble the veins on leaves. Then I added a little more Mod Podge and put pieces of tissue paper on top, finishing with another coat of Mod Podge. The MP is still milky in this pic, but can you see the "leaves?"


Next I used gobs (yes, THAT word again!) of Mod Podge to adhere burlap to two pieces of 8 1/2 x 11 chipboard for the front and back covers. I put burlap on the inside and outside of each piece of chipboard. The burlap is soooo messy (see Lesson #2), but a thick layer of MP cuts down on all those stray fibers. I even used a brayer to make sure it was good and secure. I put a coat of MP on top of the front cover, but it really didn't need it.
I adhered the strip with the "leaves" to the burlap-covered chipboard with...you guessed it...Mod Podge! Then I used my high tech multi-purpose tool (aka, felt-wrapped brick) to clamp the pieces together while the MP set up. You would be amazed with the things that brick can do! It's an excellent door stop, a very efficient aluminum can smasher, a take-anywhere vise, and Kit says it gives great back rubs (you probably can't see all the cat hair that I was unable to remove).
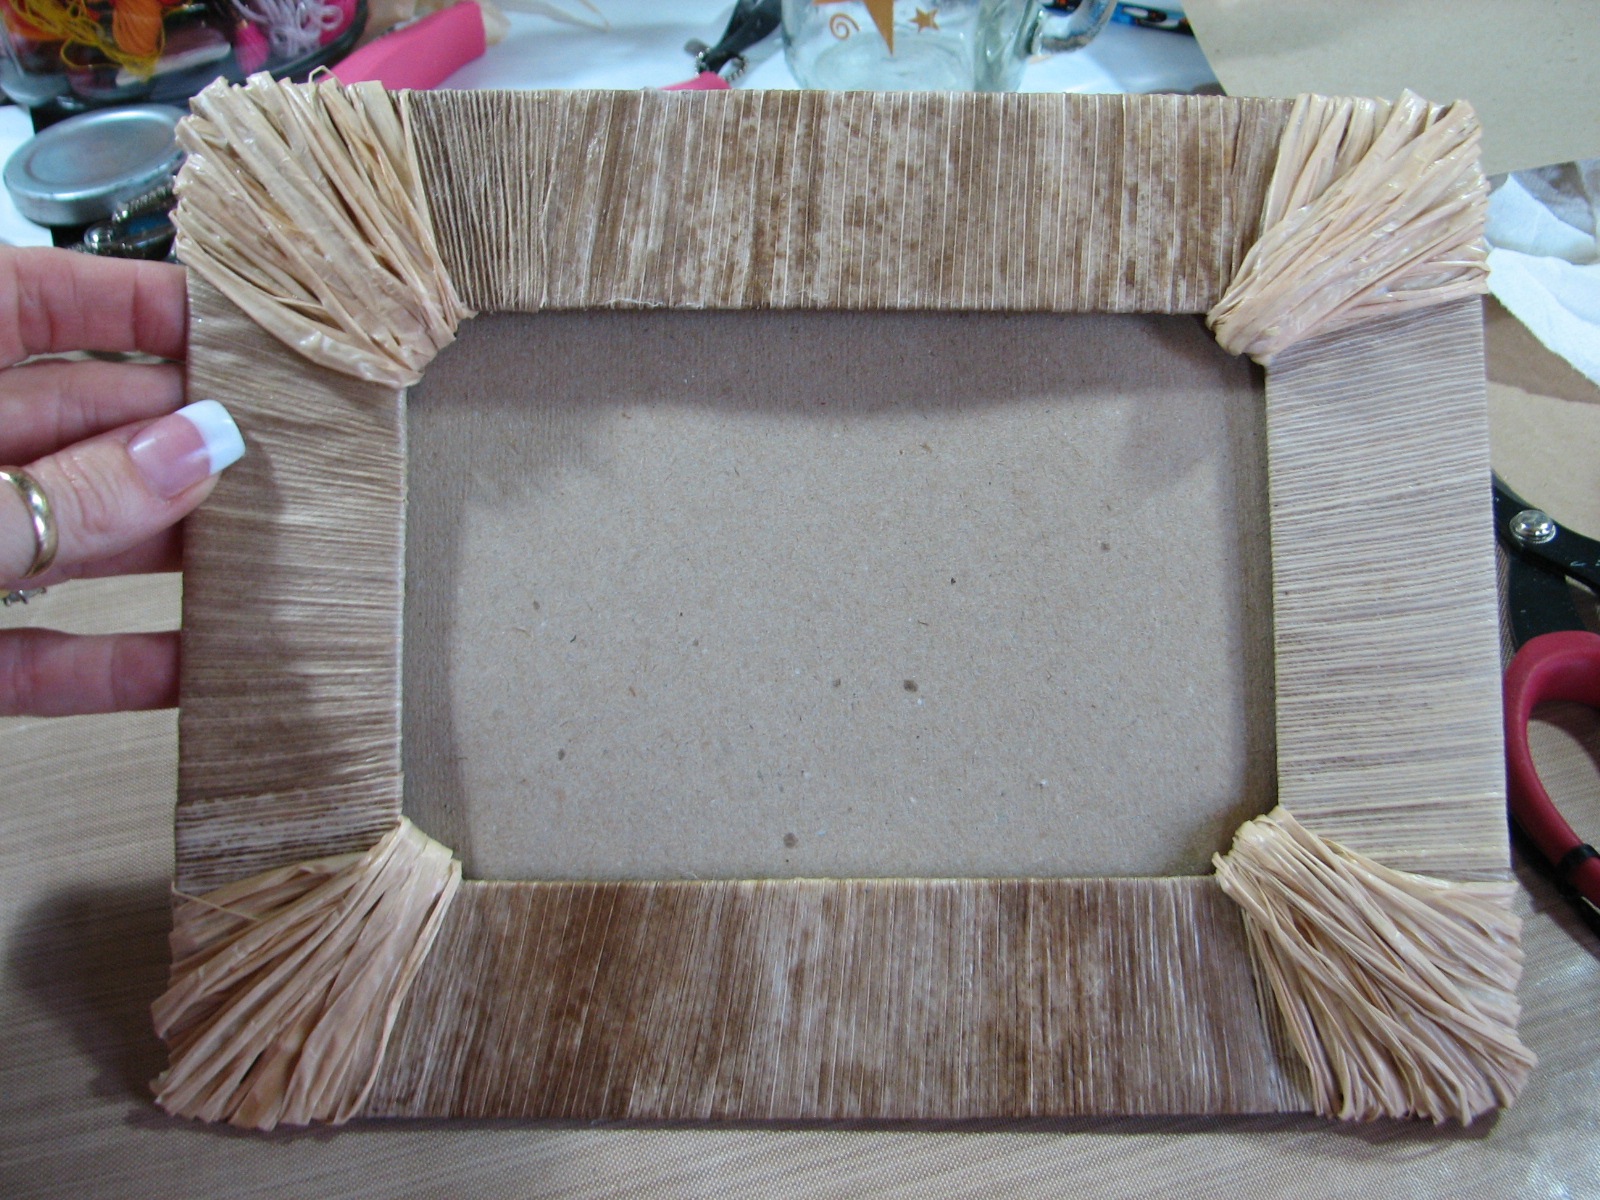
While all that Mod Podge was drying I went to work on a frame for the front cover. I cut the size I wanted from chipboard and wrapped it with the corn husks. Then I used raffia to wrap the corners. Corners are always so messy! I like to cover them with something pretty or interesting whenever I can! I adhered chipboard strips (spacers) to the back of the frame so there is room to slide a picture in and out then I put a piece of kraft paper behind the strips so it would all be easier to attach to the cover. Yeah, right....
Once everything was secure I brushed on a layer of Mod Podge to hold everything in place and bring out the colors a little. The mimosa seed pods got a coat of MP, too, before I glued them to a piece of kraft paper and cut them into triangles to put on the front cover. These aren't permanently adhered yet. I want to try soaking some in water to see if they will soften enough to wrap them around the corners (see Lesson #3), but that is for another day.

For pages I just used kraft paper cut to 8 x 12. I punched two holes thru the pages and the left edge of the covers. I threaded a long piece of hemp up through the top hole, wrapped the hemp around a stick, and took it back down through the same hole. Then I took the same piece of hemp up through the bottom hole, around the stick, and back down. I pulled both ends tight and tied a good knot at the back. If you want to try this on something but can't decipher these instructions, leave me a message or send an email and I'll add pictures.
The little bottle of sand is also upcycled. It's a Tabasco bottle -- like you get with room service -- with a tiny little cork from the hardware store. (Eat your heart out, Tim Holtz!) I brushed some glue around the top and wrapped hemp around it, leaving enough to tie it to the stick. That cute little shell has a hole in it and was just begging to be hung like a charm.This is where I had to break out the hot glue gun (see Lesson #4). The frame was too bulky and Mod Podge just wasn't going to cut it. A good glob-o-glue in each corner worked great! I also used the hot glue to attach the little shells to the bottom right corner of the frame.
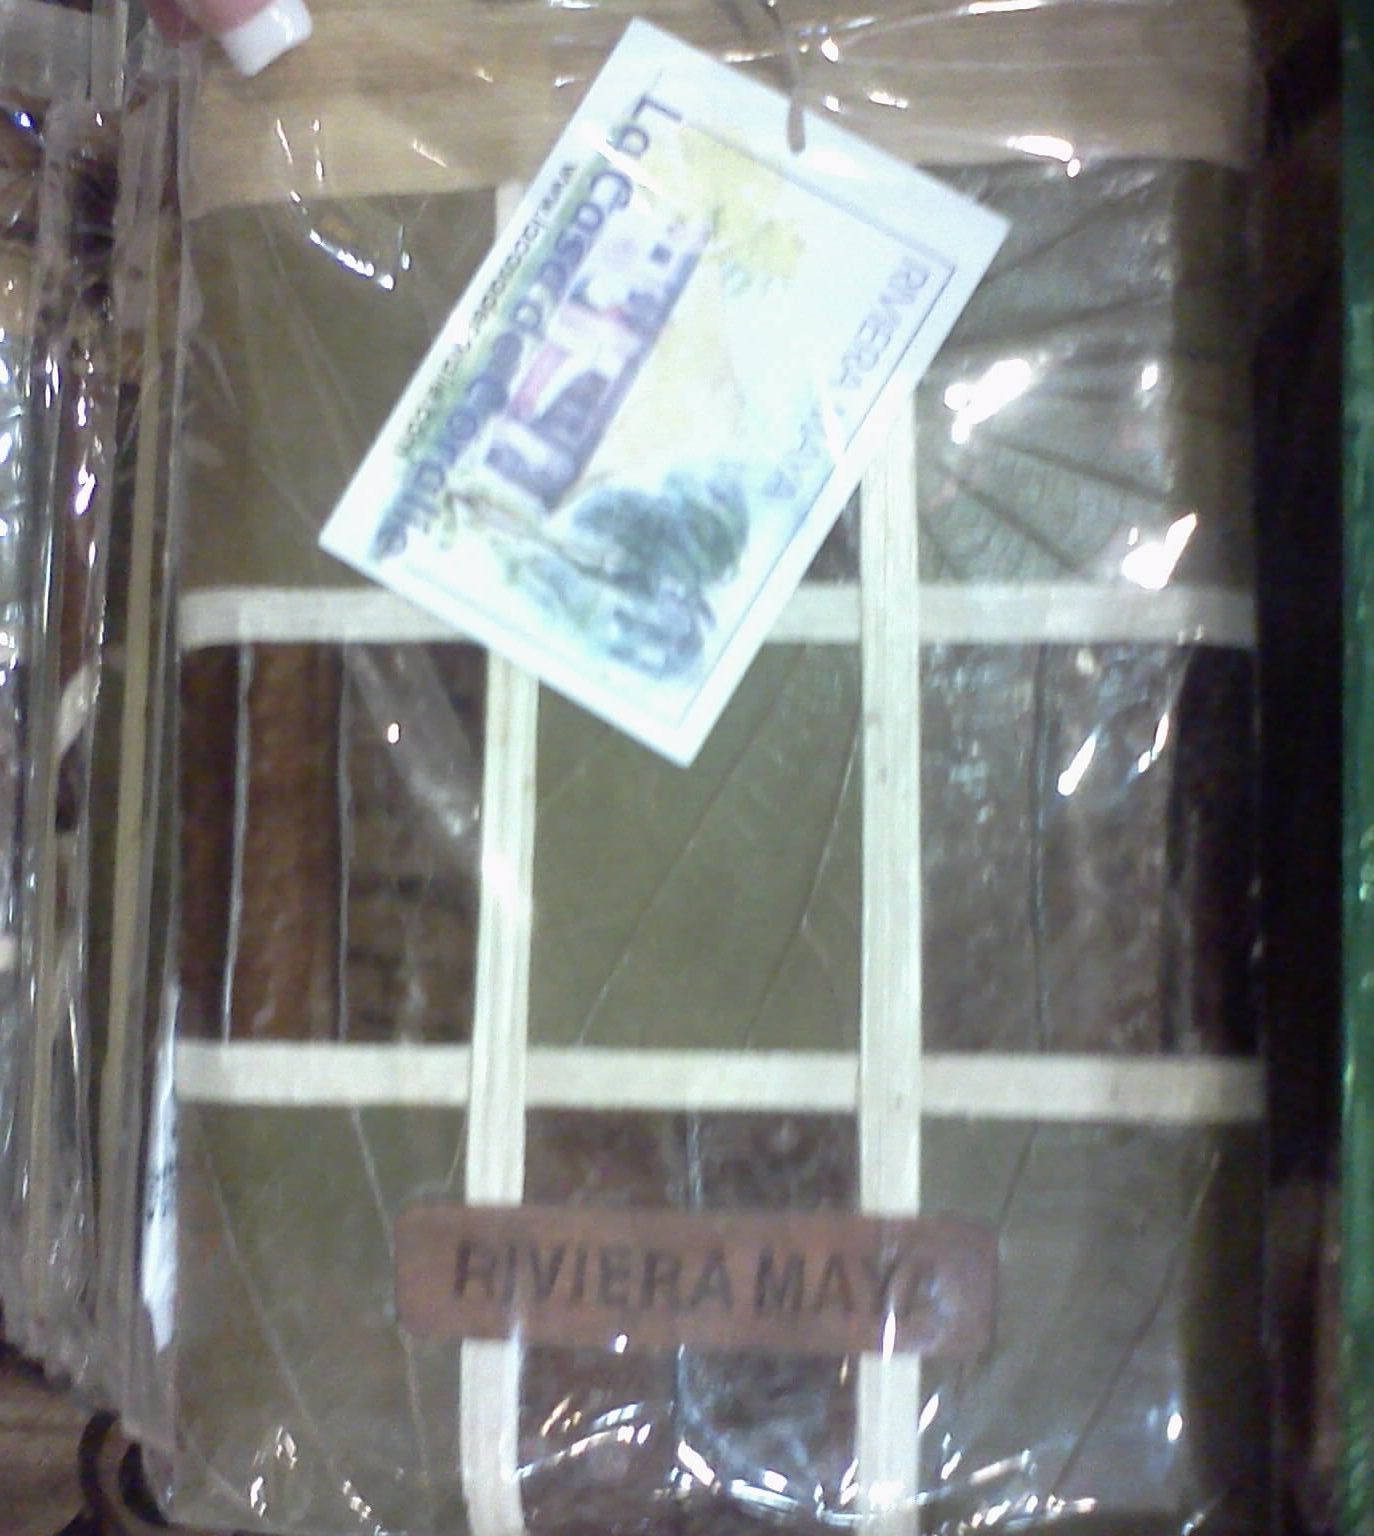
These are three of the books that served as inspiration for my Mexico book. All I had was my phone's camera but they're clear enough to remind me of how the books were made.


(That brought on a Flashback)
When I was growing up Mom made a lot of our clothes. I remember when we were shopping, she'd see something she liked and say, "I can make that for so much less!" Then we'd go look through patterns and find something similar, along with a nice piece of fabric. I guess I have just transferred that to scrapbooking, because I catch myself saying that ALL THE TIME! Thanks, Mom! That makes it more fun.
(End of Flashback)
All of the green on each book is leaves and the brown is seed pods.They really were only ten or twelve dollars (see Lesson #5), but they were odd sizes and I didn't know how well they were put together or if the pages in them were photo-safe. I thought about buying one, taking it apart, and attaching the front to the cover of another scrapbook. That probably would have worked, but I'm very happy with the way mine turned out.
I forgot the wood veneer again. Rats! I'm going to cut the word "Mexico" from a thin sheet of wood veneer that's still hiding in my closet and attach it to the bottom of the frame. This book will be for photos from the two times Andy and I have been to Mexico, and the trips the boys made with their Uncle Brian. So now I just need to print those pics. And clean my table again. Ugh!
Thanks so much for stopping by! See you Friday!
Thursday, February 16, 2012
WHAT?! A Clean Work Table? No Way!
What on Earth is going on?! That's MY work table and it looks...CLEAN! (Everything is relative, ok?)
We went to Mexico for a week--that's why I haven't posted for over two weeks--and when we got back I jumped right into designing some wedding invitations that were dancing around in my head the whole time I was on the beach. After that I couldn't see any of the glass surface on my table. Really. Not a pulgada to be found! (That's Spanish for inch!) Now about 60% of it is cleared of debris. Time to make something!

That cutting board in the middle looks like things I haven't put away yet, but they are items with a purpose.

In the top left corner is a jar of homemade walnut ink. That stuff is so concentrated! I made it a year and a half ago and you can barely tell I've used any. Working clockwise, there's some burlap, muslin, and cheesecloth (left from the wedding invitation experiments), a pad of Stampin' Up! Always Artichoke, green tissue paper, tan tissue paper, a saucer with some sand and seashells straight from Playa del Carmen, a cluster of dried up bean pods from the mimosa tree in my front yard, under the mimosa pods is a dried corn husk (saved from the tamale I had for lunch today), natural and brown hemp, and raffia. I forgot to dig the piece of wood veneer out of my closet for the picture.
Hmmm....
You're going to have to come back to see what I'm doing, but Kit, always ready to be my #1 helper, has a hint for you. See it? I'll be back in a few days to show you what I come up with and the poor quality cell phone photo of my inspiration. And most likely the big mess I've made. See you then!

Subscribe to:
Posts (Atom)